Button Bracelet Tutorial

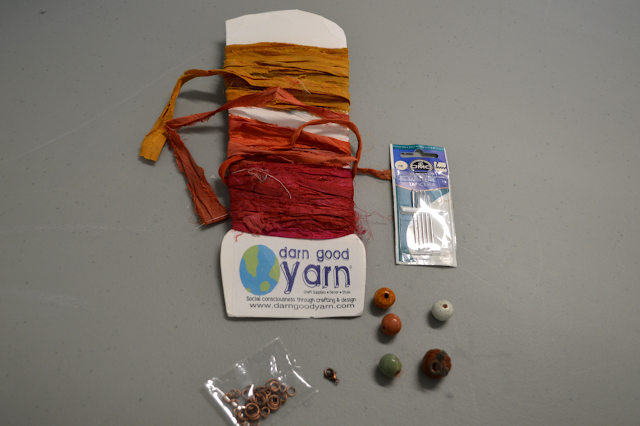
So, what do you do when you have some buttons you love but can't find a sweater they'd look good on? Make a bracelet!! It's super simple - just one skill to practice a bit! First, gather three buttons, chain, a clasp, jump rings (make sure five of them are big enough to fit through a buttonhole and then through another jump ring), some headpins, and a bunch of beads. You'll also need needle nosed jewelry pliers, regular jewelry pliers, a wire cutter, and round nosed jewelry pliers. I thought I was going to be using pearls on these seashore inspired buttons ....

button1.png

... but after I got to the part where I put them on the bracelet, they didn't look casual enough, so I found these polished tourmaline nuggets that have been sitting around for awhile. I love how they look like beach glass!

button2.png

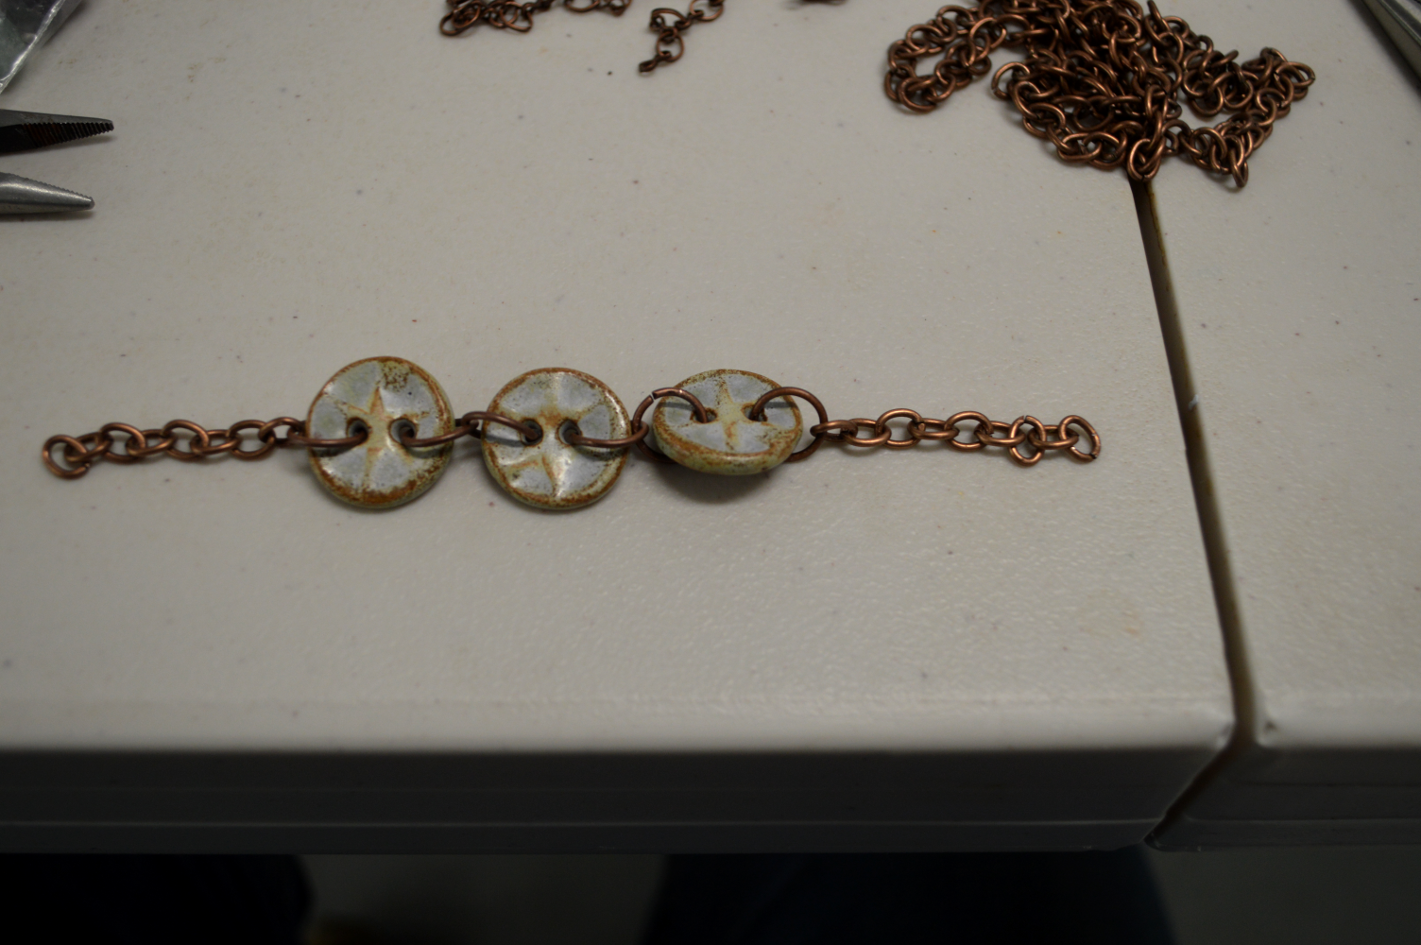
First, take one of your large jump rings and put it through a hole of one of the buttons. If you’re new to working with jump rings, read through the Simple Pendant Necklace tutorial to learn how.

button3.png

Add a large jump ring to another button and, before you close the ring, hook it through the jump ring of the first button. And sorry about the ugly bandaid in the photo - I had a run in with a kiln stilt!

button4.png

It should look like this.

button5.png

Repeat with the last button ...

button6.png

... and add a large jump ring to the empty holes on the end buttons.

button7.png

Measure your wrist - not loosely, but fairly snug. Cut a piece of chain and add it to the jump ring of one of the end buttons.

button8.png

Attach the other end of the chain to the jump ring of the other end button. Don't panic! It won't stay looking like this!

button9.png

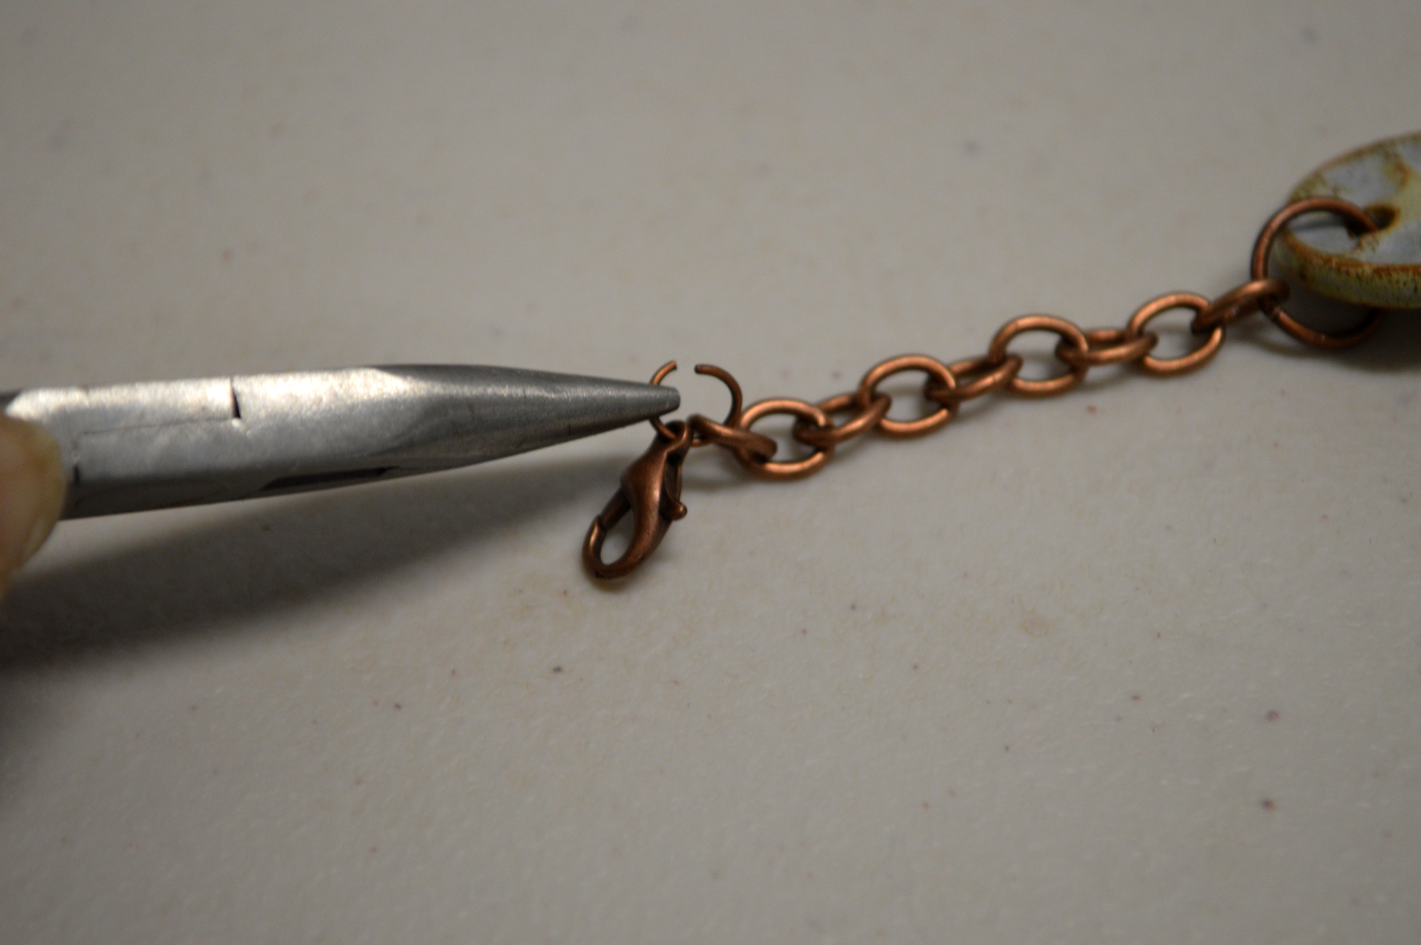
Find the middle of the chain and open that ring.

button10.png

Add a jump ring ....

button11.png

... and the clasp.

button12.png

It should look like this!

button13.png

Try the bracelet on - if you like how it fits, great! If not, add a few links from the extra chain to the non-clasp end to make it a bit longer.

button14.png

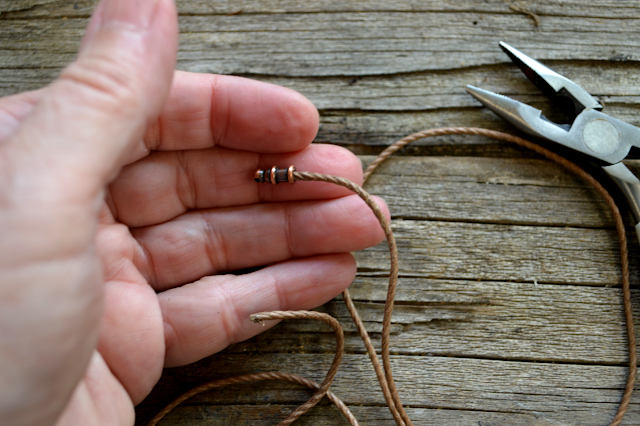
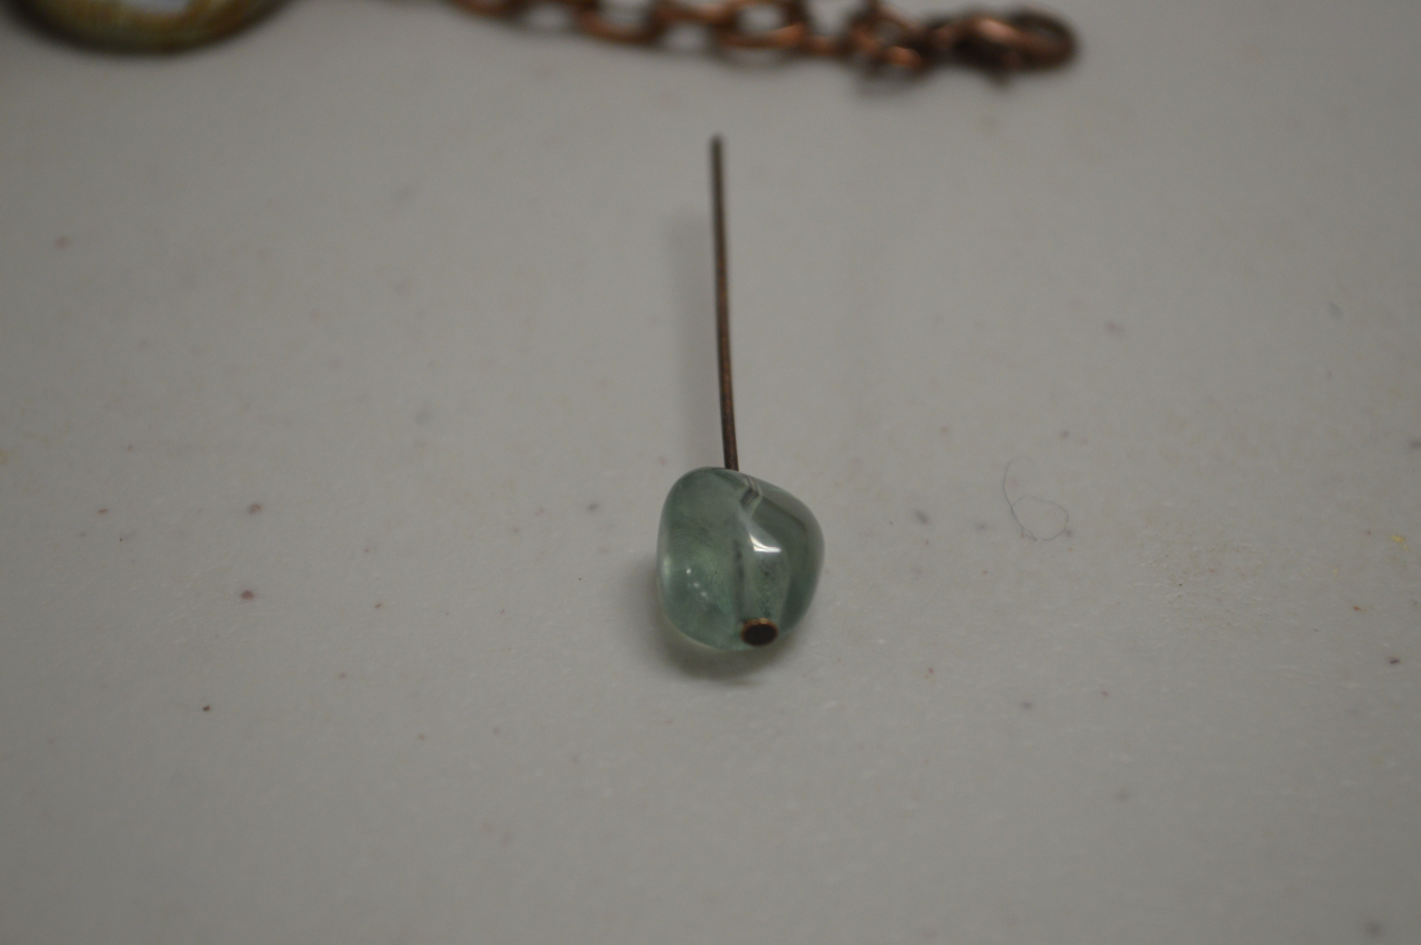
Now comes the fun part! And what might be a new skill to practice for some of you. Take one of the beads you want to attach and a headpin. A headpin is just a piece of wire with a flat end that keeps it from going all the way through the bead.

button15.png

Put the headpin through the bead.

button16.png

Take your needle nosed pliers and place them next to the bead. Make a right angle on the wire and cut off the extra, leaving about a half inch.

button17.png
button18.png

Place your round nosed pliers at the end of the wire and use them to bend the wire into a loop, making sure it closes completely. This seemed like a hard skill before I tried it, but with a few times practicing, it worked! Not as beautifully as a professional jewelry designer, but serviceable for me! I take the pliers out a few times, rearrange, and make the wire rounder each time. Find some cheap wire and practice, practice, practice!! And if you want to see the technique in action, this short You Tube Video is good.
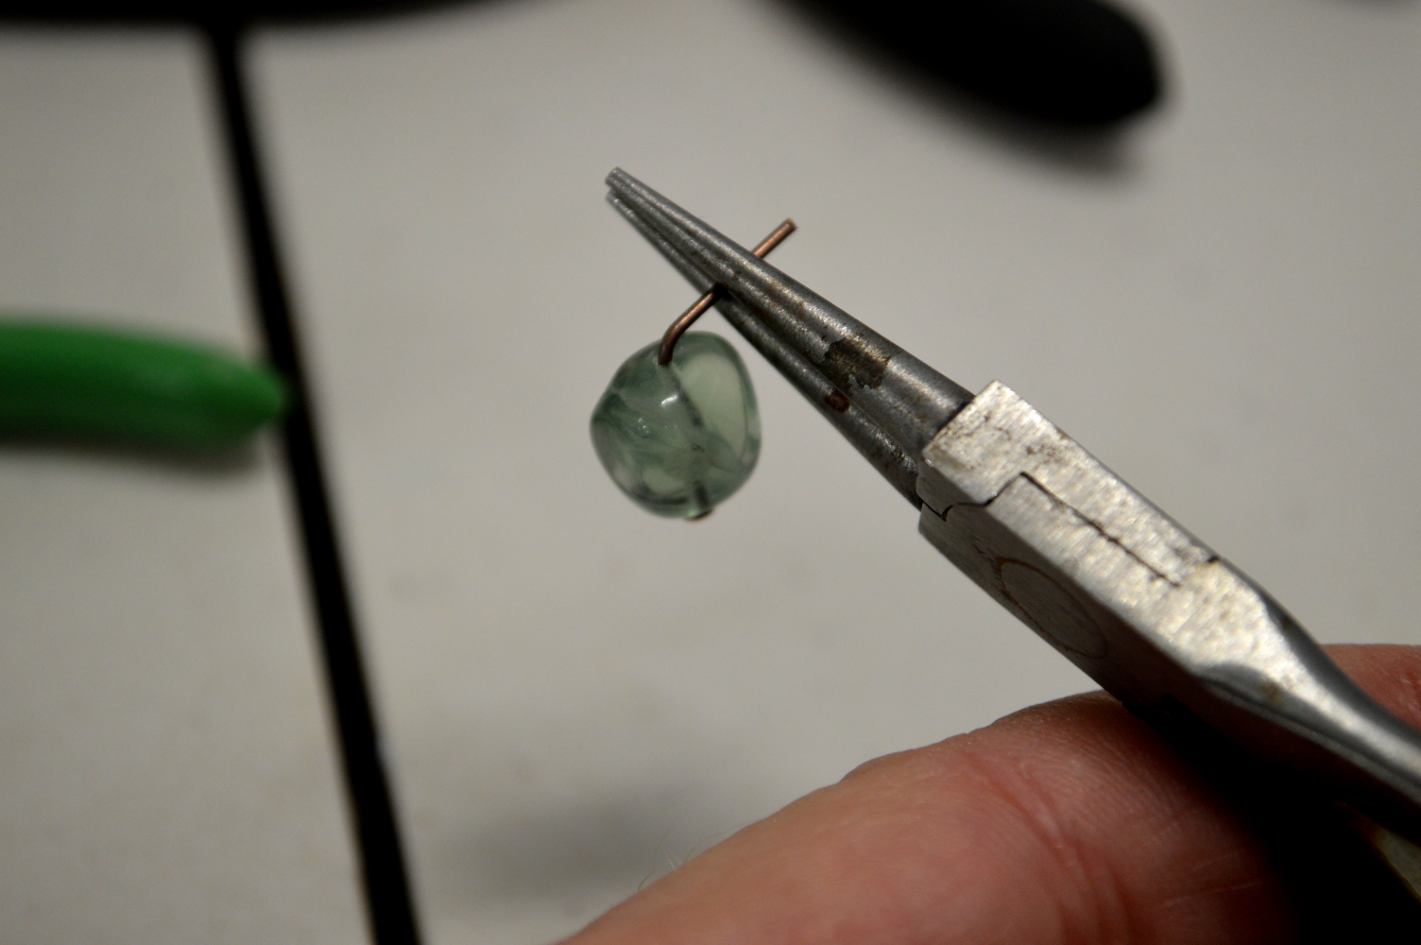
button19.png

Here's mine.

button20.png

Either before you close the loop on the end of the bead (or open it back up if you forget, like I often do), attach it through a chain link on the bracelet.

button21.png

Keep doing this until your bracelet has the number of beads you want it - I put one on every other link.

button22.png

Recycled Silk Ribbon Necklace Tutorial

I've been in love with the recycled silk ribbon that seems to suddenly be everywhere, but I haven't been able to figure out what to do with it. That didn't stop me from buying some, however! Then, while I was stringing pumpkin bead sets onto small pieces of it, it occurred to me that silk ribbon would make a great necklace! The ribbon is thick enough that the beads stay right where I put them, even without knots. I put a clasp on mine to make it look a little more polished, but they can also just be knotted like in the Simple Pendant Necklace tutorial. You can also refer to that tutorial for how to work with jump rings, if you're new to jewelry making!

First a word about where my silk ribbon came from - I ordered it from Darn Good Yarn. I love the colors it comes in and that it is made by women in fair pay cooperatives in India and Nepal. And no, Darn Good Yarn doesn't pay me - I doubt they even know who I am past my name on a couple of orders!

Materials:
*a little less than a yard of silk ribbon
*a set of beads with larger than normal holes
*sewing needle and thread to match the ribbon
*tapestry needle
*clasp
*two jump rings - one small and one medium
*two jewelry pliers

button1.png
button2.png

First, you'll probably want to iron your ribbon to get the creases out - as you can see from my photos, I didn't. The creases aren't visible when the necklace is worn, so if you're lazy like me, who didn't want to go upstairs to use the iron, it's not essential. Next, cut diagonally at the top of one ribbon end. This makes it easier to thread. Don't worry about all those loose strings yet.

button3.png

Put the tapered end through a large eye tapestry needle ....

button4.png

... and begin stringing your beads. Start with the bead you want to be the first one on the right side (when looking at the necklace lying on the table).

button5.png

I have a pumpkin focal bead on mine, so I put a jump ring on it ....

button6.png

... and strung it on, followed by the last two beads.

button7.png
button8.png

Next, put a jump ring on the clasp.

button9.png

Put one end of the ribbon through the clasp's jump ring ...

button10.png

... fold it down about one inch ...

button11.png

... and sew in place.

button12.png

Do the same with the other end of the ribbon, using a jump ring. I used a slightly larger one than I normally do since it has the ribbon going through it and still needs room for the clasp to easily hook onto.

button13.png

Now you can take all those loose strings off!

button14.png

And voila, you have a necklace! Okay, anyone on my gift list, don't finish reading this sentence - these would make great gifts, right?

button15.png

Simple Pendant Necklace Tutorial

Buying artist made pendants is an nice way to build up your jewelry wardrobe and less expensive than buying artist made ready to wear jewelry because you do the work of putting it together yourself. Today I have an easy way to make those pendants into necklaces!

Besides a pendant, you'll need cord - and depending on which technique you use, you may need super or jewelry glue, two cord end caps, two pairs of jewelry pliers, two or three jump rings, and a clasp.

button1.png

There are lots of differents types of cord one can use! I like 1 or .5 mm leather or cotton cord the best. Today I'll be using the cotton.

There are two ways you can attach your pendant to the cord. The first way is quick and easy if you have a pendant with a large hole, such as the harvest moon on the left. If your pendant has a wire loop at the top, you'll need to attach a jump ring before putting it on your cord. I'll get to how to do that further down!

button2.png

To attach cord directly through a larger hole, cut your cord about three inches longer than you want it to end up being. I like my necklaces about 26 inches, so I cut the cord at 29 inches. After the cord is cut, line the two ends up together.

button3.png

At the opposite end of your cord, you'll have a loop. Put this loop through the hole in your pendant, working from front to back.

button4.png

Now take the two loose ends of cord and put them through the loop.

button5.png

Pull tight and you're done!

button5.png

If you're using a jump ring to attach your pendant to the cord, get two jewelry pliers. On the jump ring you'll notice a line where the two sides meet. Put one pair of pliers on either side of that line (needed a third hand to run the camera!) and twist slightly to open the jump ring up.

button7.png
button8.png

Insert the opened jump ring through the wire loop on your pendant. Again using a pair of pliers on each side of the opening in the jump ring, close the ring by slightly twisting in the opposite direction.

button9.png

Now you can just string your cord through the jump ring.

button10.png

You can also use a jump ring on pendants with holes in them - you'll just need a larger jump ring!

button11.png

Now that your pendant is on the cord, there are two ways I'll show you today to deal with those loose ends. The first way is super quick, however it does leave a knot in the back (works if you have long hair) and you have to have made the necklace long enough that it'll fit over your head.

First, line the two ends up.

button12.png

Next, bring the loose ends on top of the cord to make a loop.

button13.png

Pull the loose ends through that loop - from back to front.

button14.png

And pull tight - you're done!

button15.png

For a more finished look, use cord end caps and a clasp. First put a drop of glue into one of the end caps ....

button16.png

.... then push one of the ends of the cord into it.

button17.png

Repeat with the other end cap and cord end.

button18.png

Let the glue set before you continue.

Next, open a jump ring, place it through the hole in one of the end caps, and close the jump ring. Open another jump ring and place it through the hole in the other end cap. Before closing it, put it through the hole in the end of the clasp.

button19.png

Close the last jump ring and you have a new necklace!